Thursday, April 30, 2009

Oat crumble jam bars

I’ll admit—these are not my favorite jam bars I’ve ever had. My usual recipe uses Bisquick, but I decided to try this more “natural” recipe from Nava Atlas. It’s pretty good, just less sweet than I’m used to. I also had problems with the crumbly oat topping sticking to the bars, but in retrospect I should have patted it down into the jam before baking.

The real star of these is my jam—I went on a canning spree one day in October 2006, and made a TON of raspberry and blackberry jam, so much that I’m still in the process of using it up. It turned out great for being my first (and as yet only) experience with canning. I left the seeds in, because to me, they are the best part of berries. I know a lot of people hate getting seeds in their teeth, but I love the crunch factor. I call it “Amber’s Must Love Seeds Jam.” My friend Brian thinks I should call it “Amber’s Seedy Jam”...but I digress. Whatever type or flavor of jam you use in these, make sure it’s one you love on its own.

For the bars:
3/4 cup whole wheat pastry flour
1/4 cup quick-cooking oats
1/2 tsp baking soda
1/2 tsp cinnamon
1/3 cup applesauce
1T canola oil
3/4 cup jam or preserves


For the topping:
1/2 cup quick-cooking oats
2T sugar
2T whole wheat pastry flour
1T canola oil


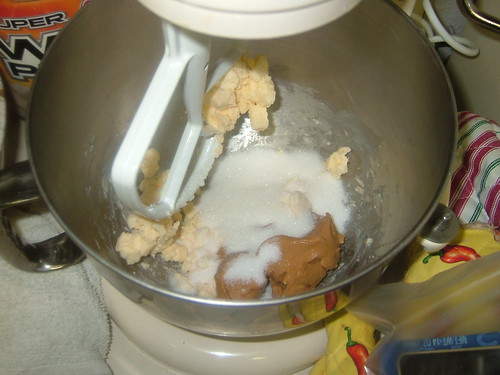
Preheat the oven to 350 degrees and grease a 9x9-inch baking pan. Unless your jam is naturally thin, put it in a small saucepan on the stove on medium-low while you make the crust. Combine the flour, oats, baking soda, cinnamon, and salt in a mixing bowl.


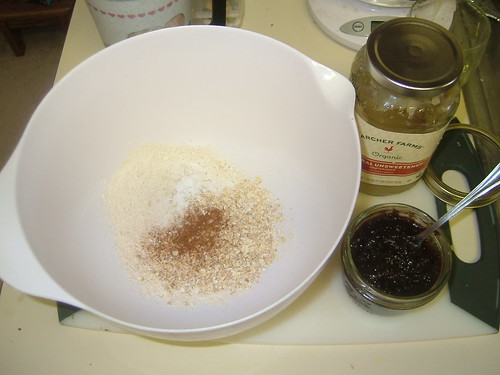
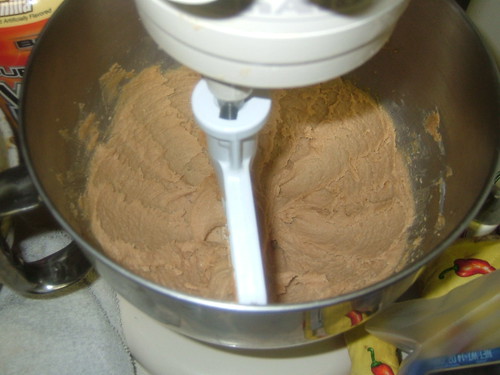
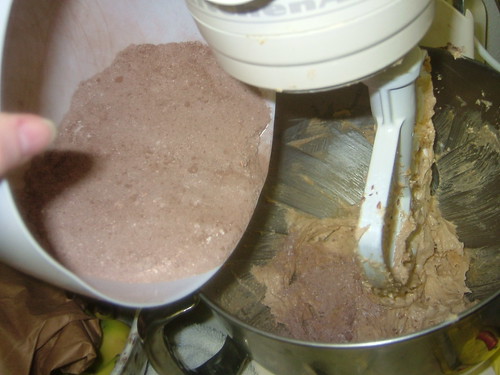
Make a well in the center of the dry ingredients and add the applesauce and oil. Stir together gently until combined. Spread the batter into the pan with a spatula and press down evenly, then pour on the warmed (and now easier to spread!) jam.


Carefully spread the jam evenly over the crust with the spatula.


In a small bowl, combine the ingredients for the topping and stir together until evenly coated with the oil.


Sprinkle evenly over the preserves, and pat down gently.


Bake for 25-30 minutes or until the topping is golden. Allow to cool until just warm, then cut into 9 generous pieces. That’s my favorite thing about this recipe—you get to eat a great big crumbly, oaty, fruity, jammy treat while barely making a dent in your calorie budget.


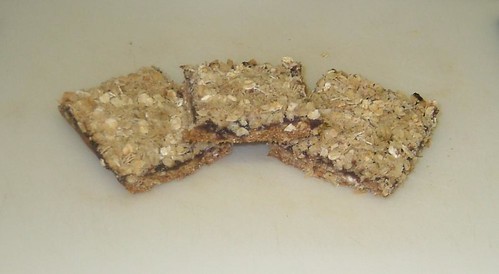
Yield: 9 big bars. Per bar: 109 calories, 4g fat (trace sat), 23g carbs, 2g fiber, 2g protein.

If you like this, you might also like...
Vegan lemon bars

Stumble Upon Toolbar

Thursday, April 23, 2009

Chickpea lentil slow-cooker stew

"Now you post a slow-cooker recipe?" I know, it’s late April (already, jeez) and the days are finally sunny and warmer again. But in KC we’re still waking up to some 40-degree mornings, so this isn’t completely out of place. I rarely use my slow cooker, which is really a shame. The problem is that since I work 9-5, in general I can only make recipes that cook for 8-10 hours, as opposed to shorter durations. Besides this limitation, I also don’t tend to plan far enough ahead to prep the night before. But when I spotted this recipe in a Whole Foods email newsletter, it sounded too perfect to pass up. Chickpeas and lentils with Indian flavors? It was made for me, I tell you. I removed the olives, added more spices, and bulked it up with potatoes and diced tomatoes to make it even better.

2T olive oil
1 medium onion, diced
2 poblano peppers, diced
1T garlic paste (or 4 cloves garlic, minced)
2 tsp ginger paste (or minced fresh ginger)
2 tsp garam masala
1/2 tsp ground cumin
1/4 tsp turmeric
1/4 cup sesame seeds
2 medium potatoes, peeled and diced
2 cans chickpeas, rinsed and drained
1/2 cup red lentils (masoor dal)
14-oz. can diced tomatoes w/green chiles
28-oz. can tomato purée
2 cups vegetable broth
1/2 cup plain soy yogurt
Salt to taste
Chopped cilantro, optional


The night before...
As you chop your vegetables, get some basmati rice going. (It's not a required accompaniment, since it is more of a stew than a curry, but I liked having some rice to go with it.) Let cool and refrigerate when done. Sauté the onion in the oil over medium heat for about 5 minutes. Add the peppers and sauté for another 2 minutes or so. Add the garlic, ginger, garam masala, cumin, and turmeric...


...and stir to combine. Add the potato and sesame seeds, stir again to combine, and remove from the heat. Let cool, then transfer to a container and refrigerate.


Go ahead and set out your lentils and cans of chickpeas, tomatoes, tomato purée, and vegetable broth so it’s all ready to go the next morning. If you don’t have canned broth, dissolve a veggie bouillon cube in 2 cups hot water, let cool, then refrigerate.


The morning of...
Mist the bowl of your slow cooker with cooking spray, or use a slow cooker liner for easy cleanup. Combine the vegetable mixture, chickpeas, lentils, tomatoes, tomato purée, and vegetable broth in the bowl. Cover and set to cook on low. If your slow cooker has settings like mine that allow you to select the number of hours you want, you can set it for either 8 or 10, depending on when you want to eat.


8-10 hours later...
When you get home from work (or get back from doing whatever you did all day), stir the yogurt into the stew. Cook on low for 15 more minutes as you reheat your rice. The yogurt adds just the slightest hint of creaminess.


Season with salt to taste, then ladle the stew into a bowl, top with a bit of rice, sprinkle with cilantro if you’ve got it, and serve.


The lentils dissolve almost completely, acting as a natural thickener. The tender chickpeas and potatoes play off each other perfectly against the mild sweetness of the tomato, and the sesame seeds add a nice, unexpected little crunch. It was hearty and filling—a delicious meal to come home to (and to eat for lunch all week).


Yield: 8 servings. Per serving: 311 calories, 7.4g fat (1.1g sat), 52.8g carbs, 9.2g fiber, 12.3g protein.

If you like this, you might also like...
Creamy chickpea soup
Three-bean vegan chili
White bean garlic soup

Stumble Upon Toolbar

Wednesday, April 15, 2009

White bean & broccoli pasta toss

A little over a year ago, I ate at a swanky restaurant downtown called Seven. The dish that jumped out at me, orecchiette with broccoli rabe and cannellini beans, was delicious— simple and elegant Tuscan ingredients kissed with garlic and olive oil. Just a couple months later, I found a strikingly similar recipe in EatingWell magazine. I replaced the broccoli rabe with regular broccoli and omitted the cheese, but changed little else. The result is a light and lovely restaurant-quality meal at home. The breadcrumb topping is optional, but I highly recommend including it; the delightful crunch is a great foil to the creamy beans.

For the pasta:
8 oz. whole wheat shells, orecchiette, or chiocciole
1 bunch broccoli, cut into small pieces
1 1/2 cups vegetable broth
1T all-purpose flour
2T olive oil
4 cloves garlic, minced
1 can navy/cannellini beans, rinsed and drained
2T red wine vinegar
1/4 tsp salt
1/4 tsp pepper


For the breadcrumbs:
2 slices whole wheat bread, crusts trimmed
1T olive oil
1/8 tsp salt
1/8 tsp garlic powder


Tear the bread into pieces and pulse in a food processor into coarse crumbs. In a small bowl, toss the crumbs with the olive oil, salt, and garlic powder. Cook and stir the crumbs in a skillet over medium heat until golden and crisp, about 3 to 5 minutes, then set aside.


Meanwhile, bring a large pot of water to a boil, and cook the pasta according to package directions. Add the broccoli during the last 2 to 3 minutes. Drain the mixture, and dry out the pot. Look at that beautiful bright green broccoli!


Whisk the broth and flour in a small bowl until smooth. Heat the oil in the pot over medium-high heat. Add the garlic and cook, stirring constantly, until fragrant, about 30 seconds. Add the broth mixture and bring to a simmer, whisking constantly, until it thickens, 3 to 4 minutes. Stir in the beans, vinegar, salt, and pepper...


...then add the pasta and broccoli. Cook and stir until the pasta is thoroughly coated and the mixture is heated through, about 1 minute. I love the way the beans nestle into the shells.


Remove from the heat, top with the toasted breadcrumbs, and serve immediately. I like to dust on a little nutritional yeast too, and feel free to drizzle on some extra olive oil as well. You can change up the main vegetable if you want (I bet this would be great with asparagus), or add extra veggies (like an onion or a couple shallots). For me, this pasta provides a warm and welcome segway into spring.


Yield: 4 servings. Per serving: 442 calories, 11.5g fat (1.6g sat), 72.2g carbs, 14g fiber, 19.3g protein.

If you like this, you might also like...
Spaghetti with raw tomato sauce
Tofu parmigiana alla marinara
Spaghetti with tomato and peas

Stumble Upon Toolbar

Friday, April 10, 2009

March leftovers

Sorry for the long absence, guys. I didn't intend to have a lull this lengthy, but I've had a lot on my plate lately (no pun intended). Let's get right to it.

One Saturday, I ate at the Thai Place in Westport with several friends. They've got some very fancy wood-carved menus there.


I hadn't had pad thai in forever, and Thai Place is my favorite place to eat it, so that's what I ordered. Yes, I leave in the egg. It's a once-every-few-months thing.


Henry's dish was vegan—bok choy and some other greens with tofu in a spicy brown sauce.


Here's a piping hot veggie samosa from Korma Sutra. Mmm!


My entrée was chana masala, with garlic naan on the side.


McCoy's in Westport actually has some great vegetarian/vegan options for a bar/pub type place, including an incredibly craveworthy roasted red pepper hummus appetizer.


My favorite stir fry at Pei Wei is the Mandarin kung pao. Tofu, broccoli, carrot, snap peas, and peanuts in a garlicky, spicy soy-based sauce, accompanied by brown rice.


Nick ordered something vegan too—a brown rice teriyaki bowl with tofu, broccoli, snap peas, and spinach.


More Indian! No, it'll never get old. More chana masala for me, and dal tadka (a yellow lentil curry) for Henry.


And lastly, Nick and I ate at Barley's Brewhaus, another bar & grillish restaurant. Not too many options there, but what I did get, I loved—a hummus trio appetizer (plain, basil, and olive) with tapenade and toasted baguette thins, and a side of sweet potato fries. Those fries were (gasp!) even tastier than the hummus!


Past leftovers...
February
January
December

Stumble Upon Toolbar

Thursday, April 2, 2009

Chocolate peanut butter cookies

Have you ever taken a bite of a just-baked treat and felt a surge of culinary ecstasy at the realization that you hit it out of the park? I experienced that with these cookies. I got the recipe from my friend Brett at work, and with two eggs and a stick and a half of butter, I never expected it to veganize as well as it did. Using two different egg substitutes seemed to help, and I was even able to reduce the margarine by 1/3. These cookies are a chocolate-and-peanut-butter lover’s dream, and suffice it to say they have a much lower guilt factor than the originals.

1/2 cup (1 stick) Earth Balance, softened
1 cup granulated sugar
1/2 cup natural peanut butter (smooth or crunchy)
1 Ener-G egg
1T ground flaxseed + 3T warm water
1 cup whole wheat pastry flour
1/3 cup cocoa powder
1 tsp baking powder
1/2 tsp baking soda
Pinch of salt
1/2 cup peanut butter and/or chocolate chips


Preheat the oven to 350 degrees. Cream together the Earth Balance, sugar, and peanut butter until light and creamy. A stand mixer is easiest, but a hand mixer would do just fine too.


Add the Ener-G egg, followed by the flax egg, blending well after each addition. Or you can do what I did, and just mix both together and add half at a time.


Combine the flour, cocoa, baking powder, baking soda, and salt in a medium bowl. Add the dry mixture to the wet mixture in batches, blending lightly on low after each addition. After adding the last of the dry mixture, blend just until combined.


Gently stir in the chips by hand. I used the swirled peanut-butter-and-chocolate chips, but you can use all peanut butter chips, all chocolate chips, or a mixture of the two if you want, or if that’s what you have. I highly recommend getting both flavors in there, though.


Talk about a delicious dough. Drop by rounded tablespoonfuls onto an ungreased (or parchment papered, or Silpatted) baking sheet.


Bake for 10 minutes. They will seem underdone when you take them out, but don’t be fooled! Cool them on the baking sheet for a good 3-4 minutes...


...then transfer to a wire rack to cool completely.


These cookies are soft and almost brownie-like in texture, with just a slight chew. The dense peanut butter merges with the tender margarine to create the ideal backdrop for the deep chocolate flavor of the cocoa. The sugar collides with the peanut butter’s saltiness in pefect complement, and the chips take it over the top. I can’t say enough about these things.


And if you were wondering, they got a resounding thumbs up from the people who tasted the originals. In short, a definite home run.


Yield: 2 dozen cookies. Per cookie: 143 calories, 8g fat (3g sat), 16g carbs, 1g fiber, 3g protein.

If you like this, you might also like...
Chocolate chip cookies
Pumkpin oatmeal cookies

Stumble Upon Toolbar